Let’s Talk Sewing with Sewn Studio
I love to help people to find the best solutions for sewing

I AM SARAH JAMES
A middle-aged sewing blogger looking to share my 30 years of crafting experience with you, dear reader. My grandmother taught me how to sew when I was barely big enough to hold a needle and thread, and I haven’t stopped since.
Since then, I’ve been working on various crafting projects, and I’m well-versed in the latest crafting trends. I started this blog to distribute my knowledge to the masses – especially if you’re not sure where to begin!
If you’re looking for in-depth product reviews, helpful blog posts, tips and tricks, and a plethora of needlecraft information – you’ve come to the right place. Please check out all my website has to offer, and happy sewing!
Read My Latest Blog & Review

Brother HC1850 Review: A Well-Rounded Crafting Machine
Are you an experienced sewer, looking for a little more bang for your buck? If you’ve been searching for a…

Best Heavy Duty Sewing Machines – A Handy Buyer’s Guide
So, you want to buy a heavy-duty sewing machine. But where do you start? Trying to find the right sewing…

Singer 4432 Review: Perfect for Novice or Experienced Sewers
Are you still trying to find that perfect blend of performance and ease of use in a sewing machine? I…
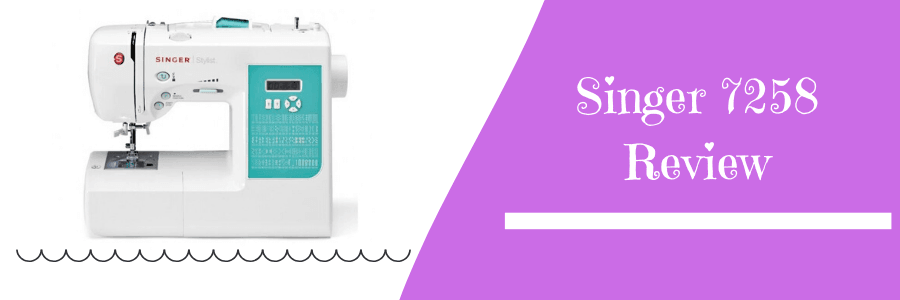
Singer 7258 Review: The Cutest Workhorse Money Can Buy
Finding your first computerized sewing machine can be a challenge. Have you had moved past the basic functions of your…